I love wildflower eruptions. I’ve witnessed these floral spectacles a few times in my life. An Appalachian forest floor covered in Phacelia, the roadsides here in the lone star state littered with Lupinus and Castilleja, and a bottomland hardwood forest so thick with Packera I could barely walk are a few that come to mind.
And, this summer, what were the odds? We booked a trip to England the same year that a superbloom was going to be planted in the moat surrounding the tower of London. Of course, superblooms are more intense than just a showy patch of wildflowers. They are a product of nature, the perfect environmental conditions causing all seeds of handful of denizens to erupt into bloom, usually carpeting the barren desert. Some superblooms are even visible from space.
However, this Superbloom was one made by man, a flora synthesized from species around the world to create a spectacle celebrating the Queen’s Platinum Jubilee. Nigel Dunnett designed the planting to make the Superbloom in the moat surrounding the Tower of London happen this summer. Over 20 million seed were planted and nurtured to be enjoyed by countless visitors.
While visiting London in July, we made a point to visit the Tower of London Superbloom. It was a wonderful case study in seeing the end result of synthesizing a naturalistic planting from seed. While I had seen naturalistic plantings developed from plugs and gallons, I had yet to really see a seed-based system. Such systems are more open to randomness and plants appearing where environmental conditions suit them. Thus, I tried to pay attention to the little details throughout the planting.
I have to had it to Nigel and his team. The bloom was probably at the closest to peak as we could have experienced it. And, bringing a superbloom into the heart of London I hope only inspired and educated people about the power of plants.
ENTERING THE SUPERBLOOM
We arrived right after they opened and thus beat the crowds. I was aware of the calm colors used at the entrance—whites, soft yellows, greens, browns, and blues with a few other pastels mixed in.
The view walking into the superbloom. Notice how the colors started soft and mellow. A pathway allows exploration, and a kettle hides a grate.
Here we see pops of color, but overall the planting isn’t too intense.
Woven willow added legibility between path and flowers. The introduction of oranges from Calendula, Dimorphotheca, and Eschscholzia add some pop to the planting.
SUPERBLOOM SLIDE
I mean, if you’re going to have a superbloom, you might as well have a superslide, right? Near the entrance was a fun way to get kids more engaged with the space.
The planting around this structure was my favorite of the experience, I think because of the layering, texture, and color. Verbena bonariensis and Oenothera (Gaura) lindheimeri both provided this moving, emergent layer above the umbels and asters below. In this section it was clear that plugs had been introduced as we saw Kniphofia, Sedum, Stachys, Agastache, and other plants that had significant biomass that would have unlikely been achieved in one growing season from seed.
Wildflower plantings around the superslide.
I was quite fond of Verbena bonariensis and Oenothera lindheimeri early on in the display. Here it was evident they had used plugs to bolster the underplanting.
I also admired the verticality of the Agastache inflorescences.
Here you can also see the diversity in this initial section.
The Verbena bonariensis faded away as we approached the mass planting on the western side of the Tower of London.
THE WEST SIDE
Past the superslide was a large open area where the flowers formed a living tapestry. Blues of Echium vulgare and Centaurea cyanus softened our approach to the more vibrant oranges and yellows . It was shocking seeing so much color after the cooler colors of the Verbena and Gaura section.
You can see the shift in color and planting here as the blues and purples gave way to the yellows and oranges.
Atriplex hortensis ‘Rubra’ emerged from the golden haze of wildflowers below.
The eyespots of Coreopsis tinctoria were a nice color echo with the Atriplex hortensis ‘Rubra’.
Further from the Atriplex hortensis ‘Rubra’, sunflowers were used to provide the emergent layer.
As we walked on, other colors were mixed back in to give the eyes a break from the yellows and oranges.
This photo is one of my favorite shots of the superbloom for the diversity of colors and species.
It truly is amazing thinking that most of this developed from the planting of 20 million seed.
One of the few sections of the superbloom that we saw where things were beginning to be past prime for color. The seedheads were noted to be important for birds.
In this western section, it became clear that the superbloom was designed to be an immersive experience. While the path was off to one side, there were these small circular viewing areas that allowed visitors to step into the space.
You can see there are a few of these compartments for a visitor’s viewing pleasure.
A photo from the walkway above before we entered really gives a perspective of these puzzle piece edges. I liked how on this western side that the foot traffic was confined to one side so that it really allowed us to appreciate the scale of the wildflower planting.
A close up of one of viewing areas
Karen paused in one of the circular areas for a photo with the wildflower backdrop.
THE NORTH SIDE
As we approached the north side, one of the pleasant surprises we experienced was natural music being played. Erland Cooper who creates natural synth music composed Music for Growing Flowers specifically for the superbloom. It was a twenty-minute looped piece, and you can listen to it here. It was a delight to hear the music over the bustle of the city, and it made me ponder why we don’t use music more in gardens?
On a sign he said, “I plough themes of the natural world for inspiration and wanted the ambient score to feel conducive to a growing environment. As music is just vibrations of sound, I’d like to think that it is encouraging the flowers to grow in their life cycle over the summer, boosting biodiversity and helping on this rewilding journey.” A lovely thought indeed.
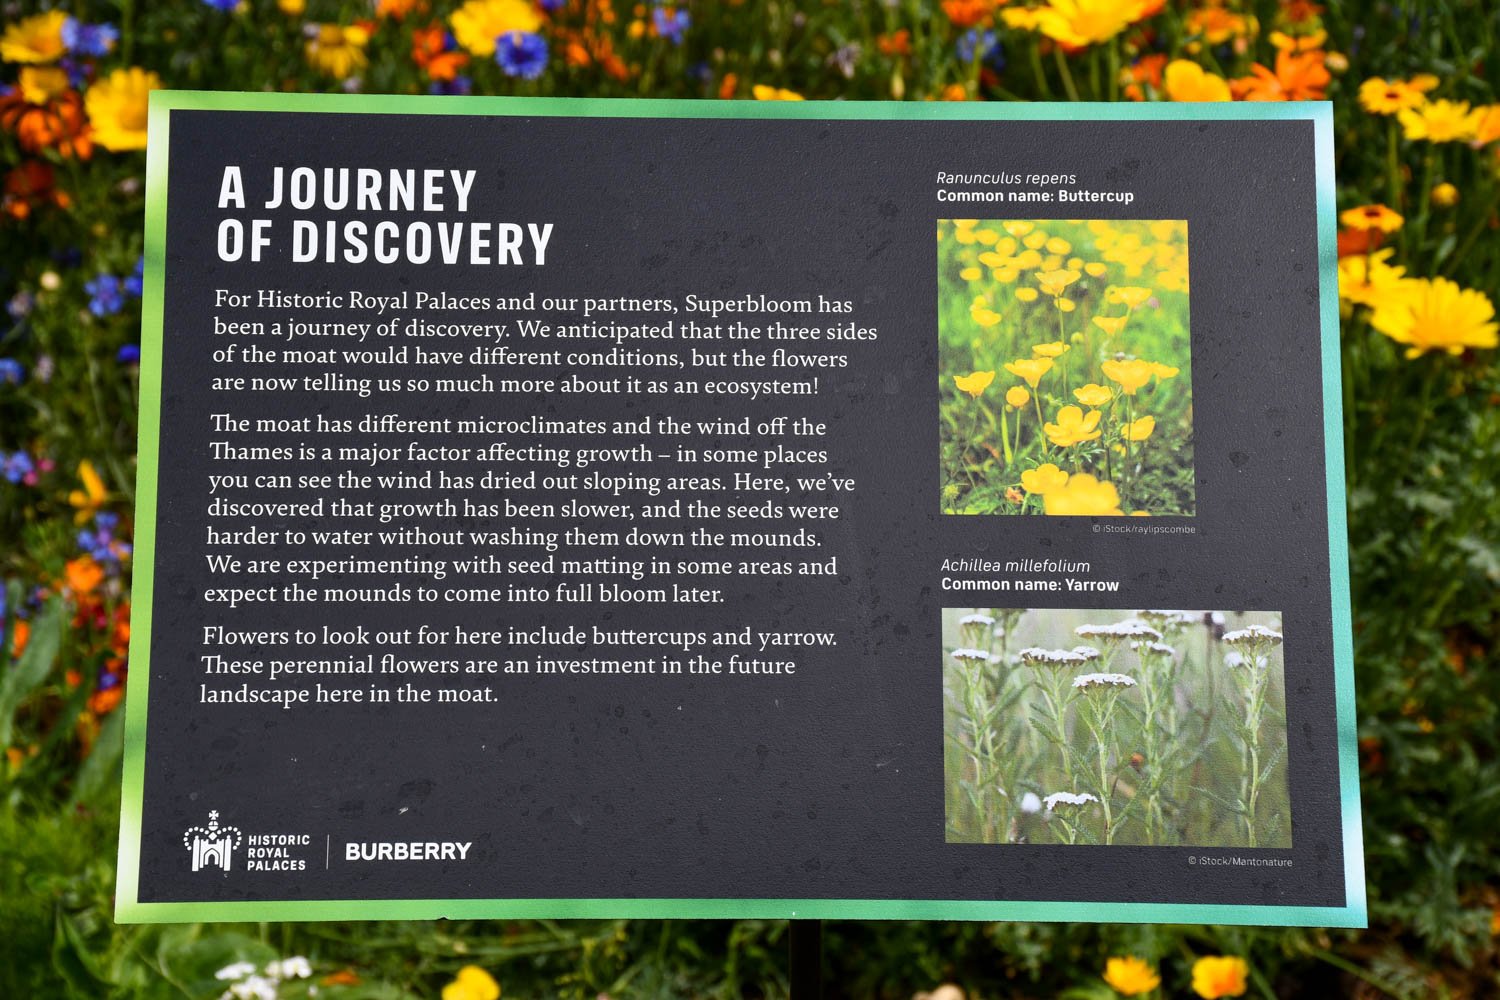
I really admired the efforts to educate the public with the signage provided. Below is just one example of many that communicated the dynamics of the superbloom site.
While I took photographs of many of the signs, I chose to share this sign specifically because it alludes to the changing conditions for establishing seedlings on the site.
I noticed that in one area, the seeds seemed to have a hard time getting established. I asked a volunteer about it, and he said that heavy rains in March had washed some of the soil away.
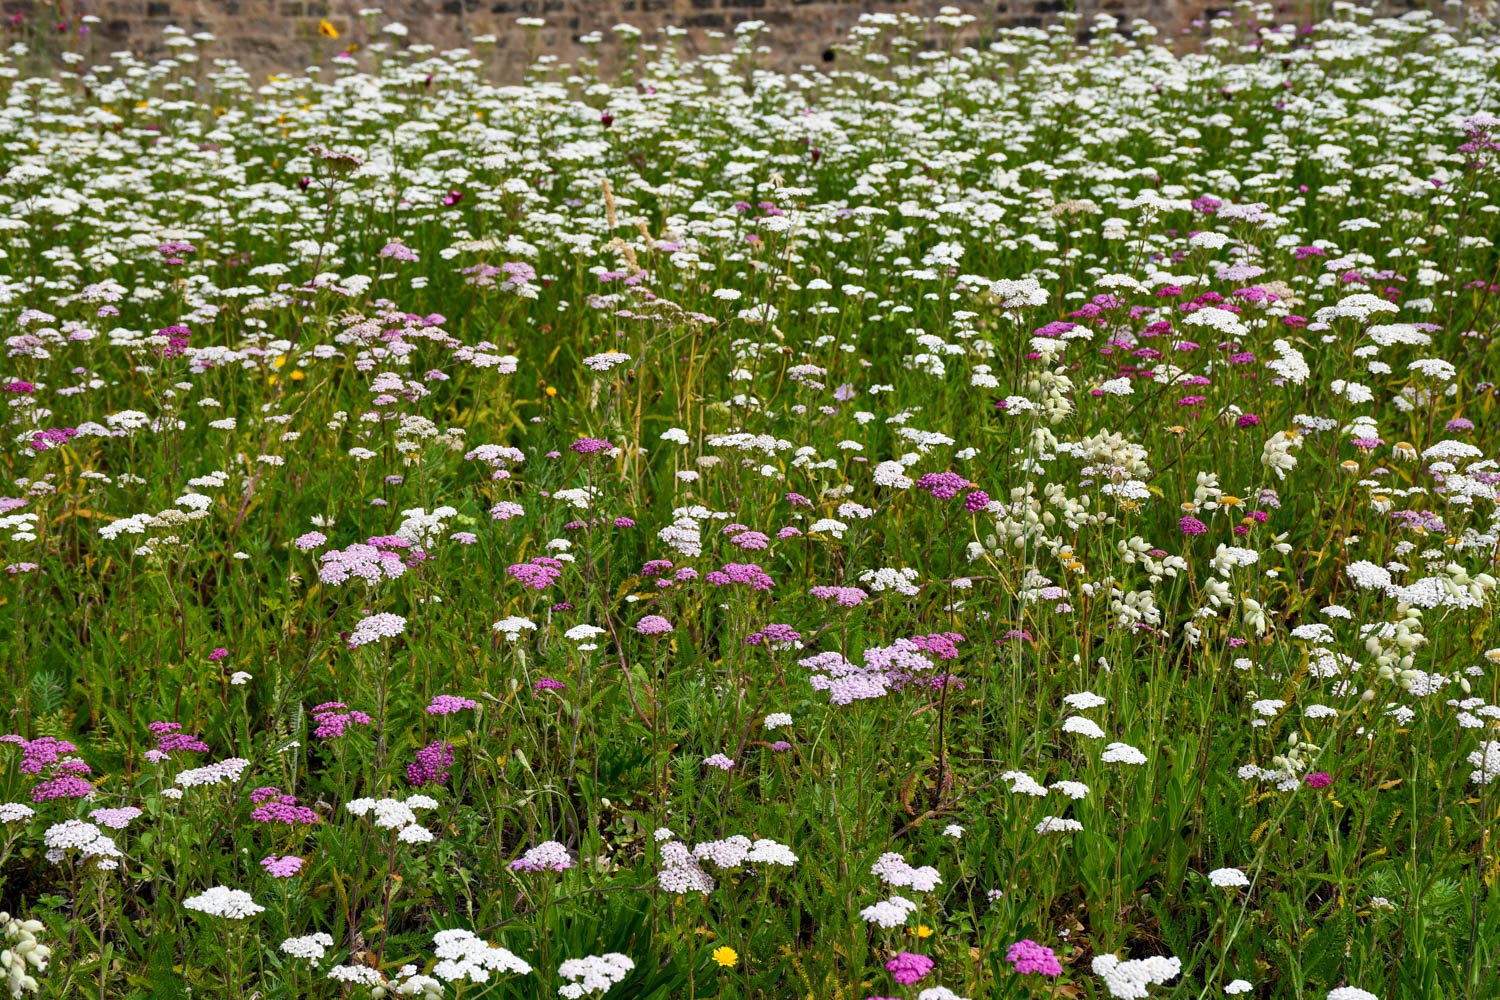
While I was standing looking at this space, I saw a demarcation line between a big expanse of yarrow and the seed-sown wildflowers. It hit me that I was looking at wildflower sod.
As the sign alluded to above, there were establishment issues in the spring, and so I assume that wildflower sod was brought in to fix that issue. I think the first person I heard using wildflower sod was Carrie Preston at the 2017 Philadelphia Flower Show. This section of the Superbloom was the first time I had seen it used in person, and I thought it a brilliant backup plan because I’ve had issues with getting seed to establish via direct sowing, too.
Here you can really see the sod line on the yarrow and the lack of establishment from the seed.
This photo is a shot right behind the one above where you can see the sod line. Isn’t this mass of Achillea lovely? My guess is that at least part of this was established using wildflower sod.
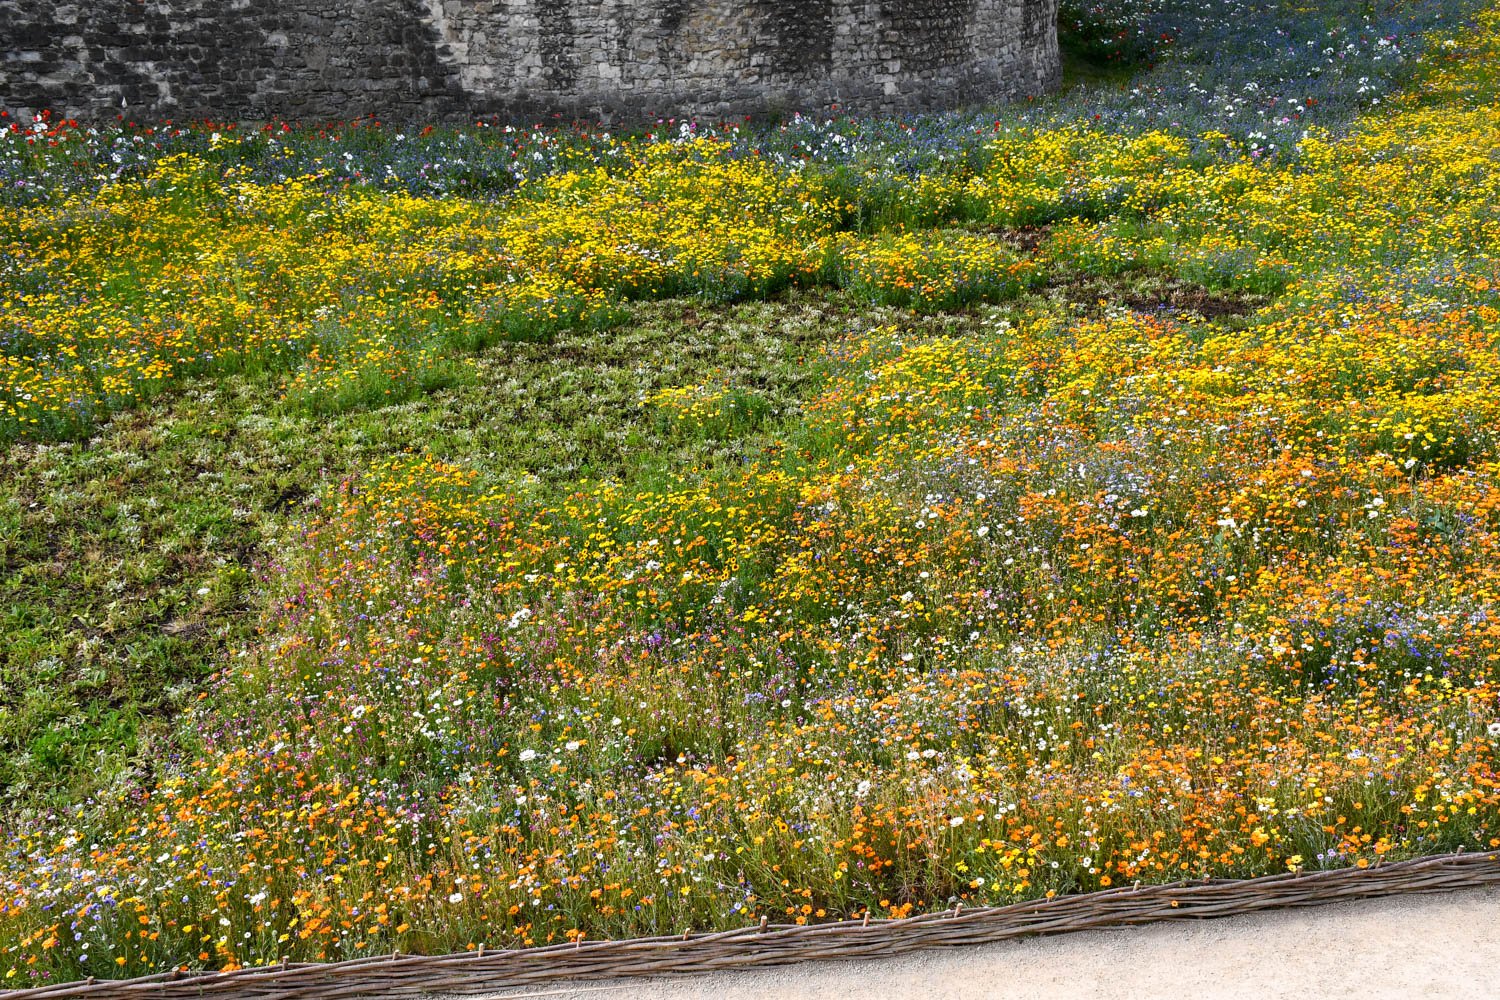
I was also very curious about these patches that were devoid of any flowers that I saw at the Superbloom. They were mainly on this northern side of the Tower of London. I noticed them before we entered from the walk way above. At first, I thought that they had cut the wildflowers back for regeneration, but once on the ground I realized I was wrong.
I don’t think that the bare spots detracted. They served as breaks in the superbloom, areas where just like in nature the wildflowers aren’t as abundant.
Instead, what I was seeing was fresh wildflower sod that had been laid. In some areas it was more established than others. My guess is that as sections have petered out or had poor establishment, the sod is an opportunity to replace those areas. I had wondered how one could keep such a spectacle going, and so these observations helped make more sense, though I’m not suggesting they used the sod over the entire area. I really think they had crafted a mix for long season interest. But, if the seedlings don’t take, this technique is an option for a bandaid for these styles of plantings.
A close up section of wildflower sod that looks recently laid down. I can make out what looks like the silver-leaves of Lychnis and the emerging feathery foliage of Achillea.
A patch of wildflower sod from a broader perspective. Notice the overall brown coloration, and compare with the photo below.
Here is another section of sod that is more established. Notice how much more verdant this space is.
I share all this not to detract from the Superbloom or to degrade it but to share the nuts and bolts of how it is managed. As I said earlier, seeing it in bloom is a wonderful case study for learning, and I am fascinated by such minutiae. I admire the creativity to have options to keep the space looking fresh and alive.
THE EAST SIDE
As we walked eastward, we began encountering small hillsides of wildflowers. Yet another way to make the site more engaging was to create changes in elevation for the wildflowers, which was achieved by bringing in soil and sowing seed on these raised areas.
Here you can really see the elevation change on this hillside. You can barely see the people on the other side who are standing on the pathway.
What I liked about the elevation change is that it brought many of the wildflowers up to face level, so that instead of looking down one looked toward them.
On the far northeast side was a beautiful willow sculpture called Nest by Spencer Jenkins. Having structure in the Superbloom gave it a sense of permanence, even if it was made from natural materials.
I’m a sucker for woven willow, and Nest by Spencer Jenkins was a lovely homage to the animals that share the space with wildflowers.
This vantage shows how the curves of Nest blend well with the sways in the planting beyond.
The last section had a vegetable garden feel. There were enclosed spaces with winding pathways. The incorporation of dill and sunflowers added to the allotment feeling. It was as if the design communicated, “I’ve taken you through what it might look like in the wild, and now let’s consider how we could incorporate these ruderals into our gardens, big and small.” In this space there was a nice pollinator display with woven branches and metal sculpted pollinators above.
This space looked like a summer vegetable garden erupting with growth.
More willow structures added to the organic feel of the site.
Papaver, Anethum, Centaurea, and Echium were the last big dominant species in this space.
Another shot of the wildflowers at the end of the Superbloom.
Artist Mehrdad Tafreshi made these cool brass and copper pollinators that hovered over this last section.
SUPERBLOOM AT NIGHT
We had a glimpse of the Superbloom the night before we walked through it. My colleague Andrew Bunting of the Pennsylvania Horticultural Society had visited only a week earlier. I saw his incredible twilight photograph on Instagram, and I knew we had to visit in the evening. I snapped a few photos just before sunset. It was really something else to see lit up at night.
An almost duplicate of the image I saw Andrew post a week prior to our visit. Seeing the Superbloom early before it got crowded was on my itinerary, but after seeing his photo, I knew we had to visit at twilight, too.
It was amazing to see how the wildflowers at night glowed when shined with colored lights.
A photo of the eastern side of the Superbloom glowed under purple lights.
One of the things about wildflowers is they not only catch sunlight but they also are great at refracting light at night.
The July 2022 super moon shined over the glowing Superbloom.
After the experience, I thought it funny. I’ve never been out west to see the famous California superblooms, and here I have traveled a quarter the way around the world to see one. And, just like many of the superblooms here, this display was ephemeral. It won’t last much longer with the close of summer upon us.
But, the memory of such sights lasts. I hope that with this photo journey you feel inspired at such a massive display of wildflowers, too. It makes me think about how I can incorporate more ruderal plants into my garden to make a mini-superbloom of my own.


