Spring Plant Fair 2022

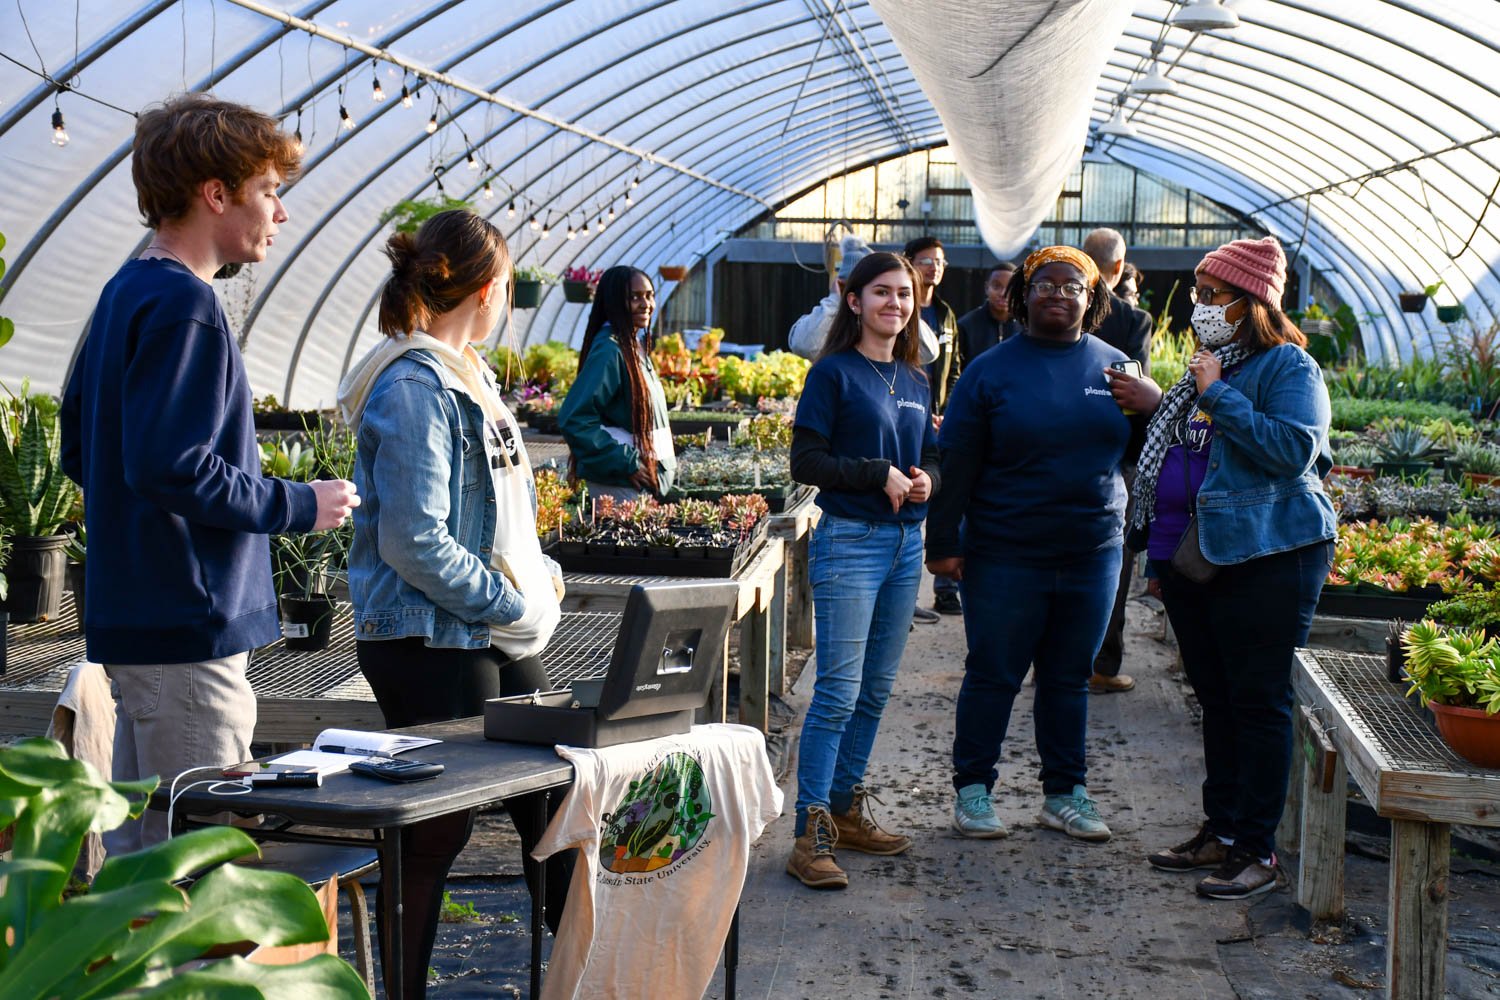
Our spring plant fair was held this week, and it far exceeded our expectations. In just a couple of hours, we broke all our past records for amount of money raised at a plant sale! For me, what mattered most was seeing the hard work that our students put into making this event a success and then seeing such a positive response from the public. My team of student apprentices were absolutely elated. These events are an open house for the public to come see how students grow plants, and since all funds from the plants purchased come back to support educational endeavors, it is also an opportunity for visitors to see what new projects students have been developing. Follow along below for photos from the event and a few great plants that look good as we near the end of the semester.

The glasshouse quickly filled up with patrons. Eventually, there was a line out the door for a solid 45 minutes!

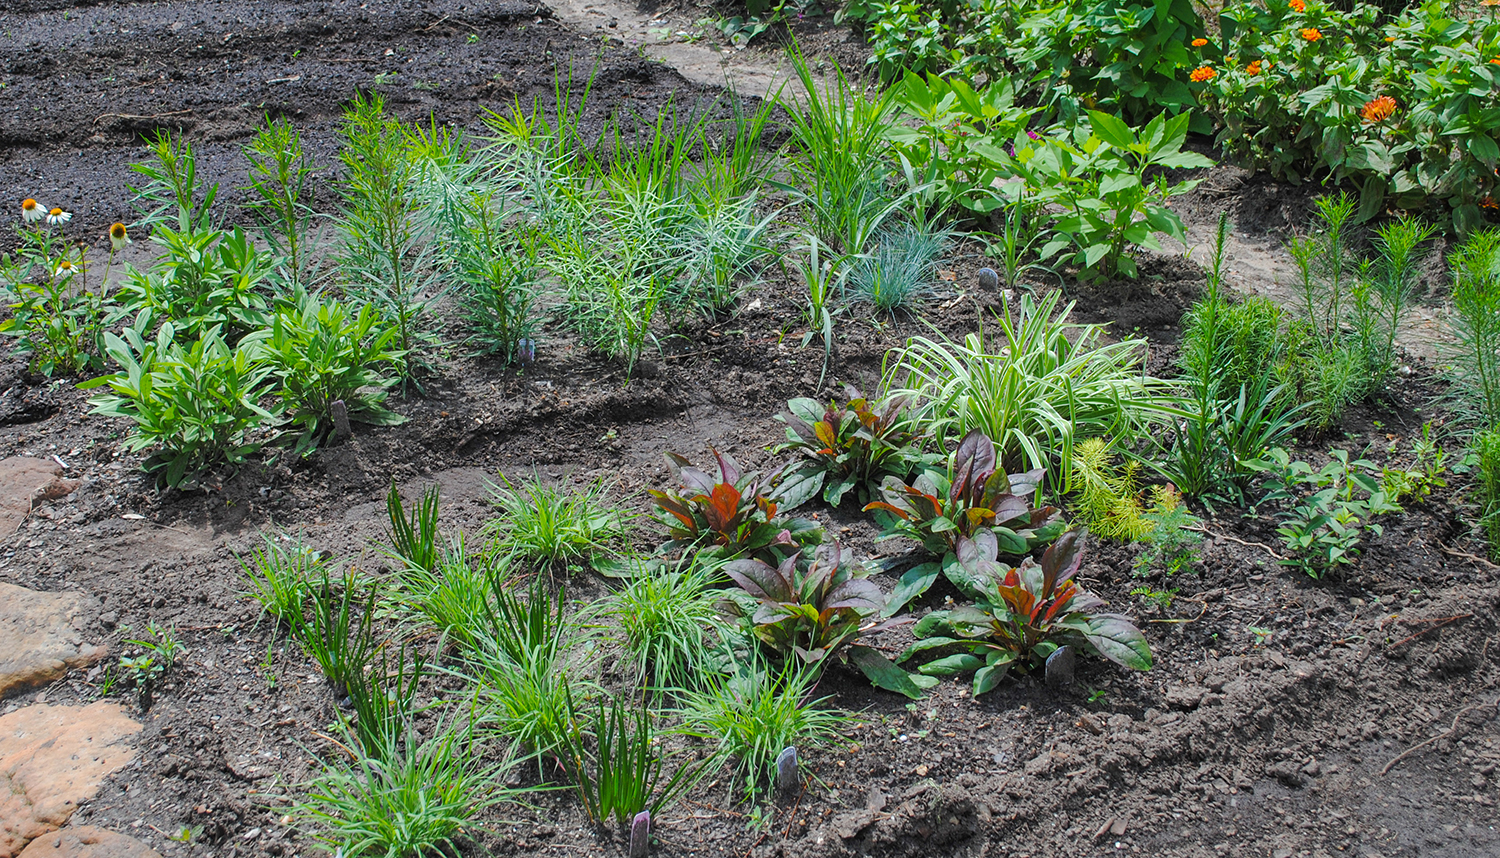
Plantery apprentice Ben (far right) gives a tour of the gravel bed and new willow fence students built.

Here’s a ground-level view of the spectacular willow fence that our students built this spring. It won’t last forever, but having this ephemeral and functional art really encourages creativity within the Plantery.

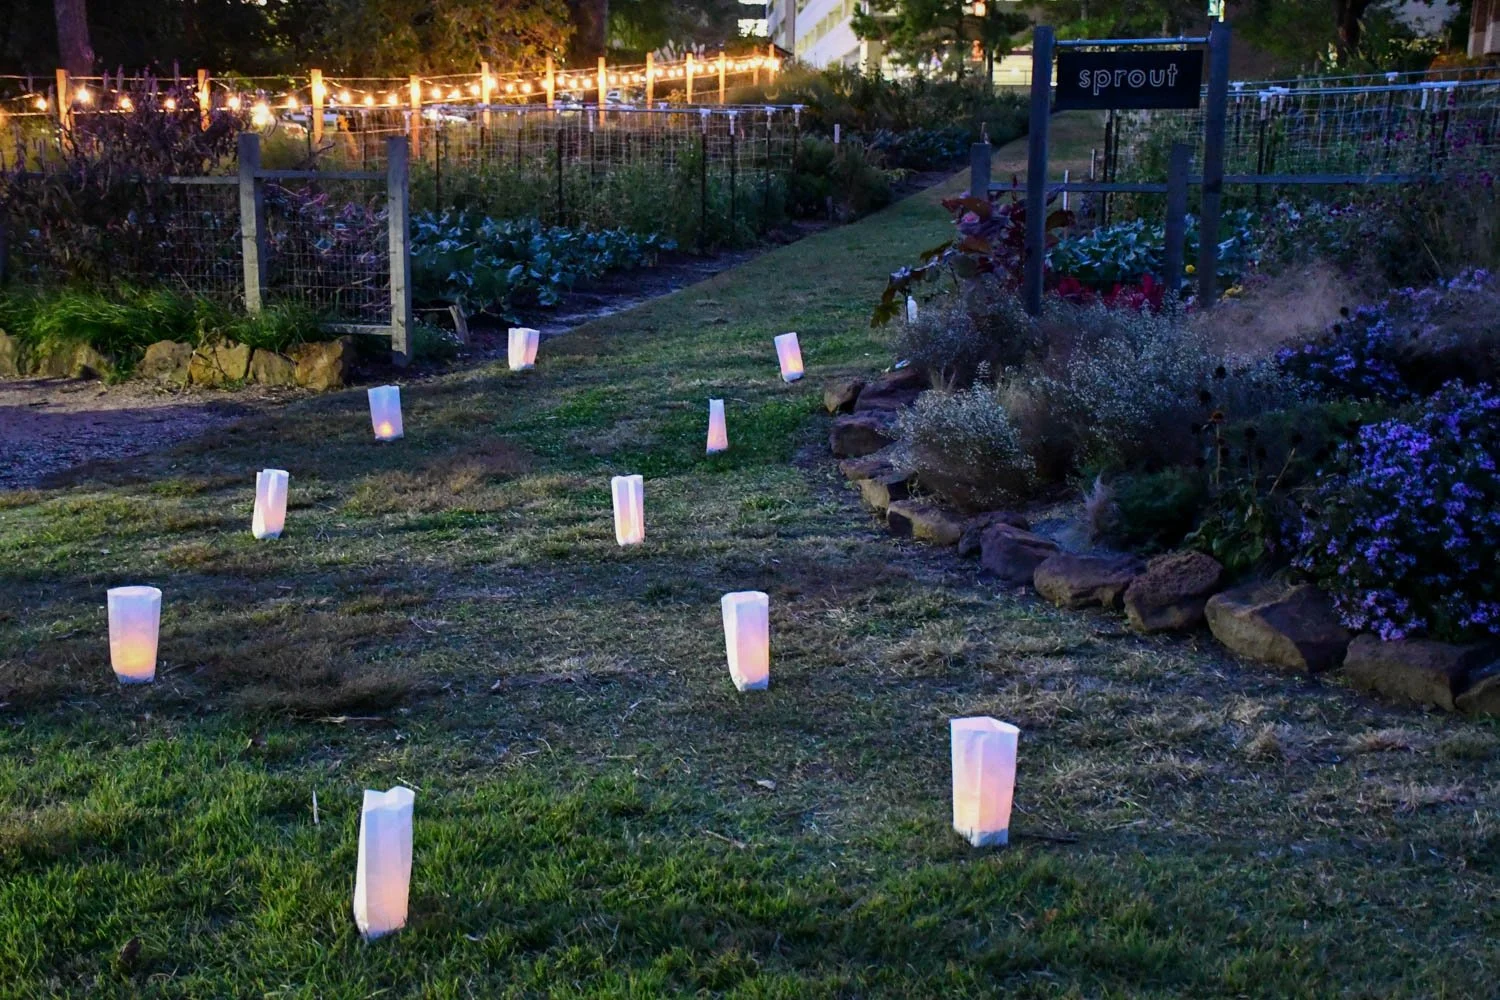
Bonfires for s’mores and karaoke enlivened the event.

Hannah (L) managed the karaoke booth while singers like Hailey (R) took the stage and sung their hearts out.

My colleagues Drs. Stephanie Jones and Michael Maurer enjoy the s’mores campfires.

Kathryn (L) and Hanna (R) are all smiles during a brief moment the greenhouse isn’t packed with people.

And, we can’t have a plant fair without amazing plants! Gaura lindheimeri ‘Sparkle White’ was just coming into flower with its charming gossamer blooms.

The blooms on Manfreda ‘Spot’ had been much anticipated for weeks as students watched the inflorescenses rise. We were glad they were still in flower for the plant fair.

One of my favorite contrasting flower combinations of late is this pairing of the giant golden flowers of Oenothera macrocarpa with the deep purple Glandularia canadensis ‘Homestead Purple’. They are both thriving within our gravel garden strip alongside the headhouse.

The flower on this Astrophytum myriostigma had just closed for the night.

We tried an aloe in the gravel bed in a very protected location, and we were delighted to see it return and start flowering this spring.

Verbena bonariensis bloomed above a carpet of Oenothera speciosa.

And, one of the highlights of the spring plant fair was seeing all the plants we grew for the fall plant fair at their peak. Here a carpet of Jacobaea cineraria (Senecio cineraria) ‘Silver Dust’ and a few plants of ‘New Look’ in the container brighten a bed near the headhouse.

The Landscape Olympics

Last week, I was in Ft. Collins, Colorado with a team of six students participating in the National Collegiate Landscape Competition.  It may surprise you that there’s actually a competition for students to practice around 30 different horticulture skills including hardscaping, bench building, and driving a skid steer.  I know it did me when I first heard of it years ago, and surprise is usually the reaction I get when I tell people outside of horticulture where we go.  

This opportunity is an incredible chance for students to really spread their roots into the green industry.  The competitions require undergrads to practice skills before they arrive, and the career fair challenges them to engage with industry leaders.  As a professor, it’s inspiring to see so many different companies present and willing to help students.  I believe that it’s one of the best events for students to attend.  

Oh, and I guess you want to know if we won anything!  Anna Claire won best student for the social media competition, I won the faculty social media award, and the school won the overall social media award.  In all it was $2000 cash, $500 in Permaloc edging, and $500 in Corona tools.  

Below are some pictures I took from the event.  If you aren’t familiar with the competition, check it out and consider helping a local team in your area!  Sam Hill Tree Care, Benchmark Landscapes, and Yellowstone Landscape supported our team and allowed us to do more at the competition.

 
Hardscape installation! Our team qualified for the first time this year. In this contest, students have 1 hour and 50 minutes to install a patio.

Hardscape installation! Our team qualified for the first time this year. In this contest, students have 1 hour and 50 minutes to install a patio.

There’s also arboriculture where students can show off their climbing skills.

There’s also arboriculture where students can show off their climbing skills.

The last contest of the event is landscape installation teams of three have two hours to install a planting to spec.

The last contest of the event is landscape installation teams of three have two hours to install a planting to spec.

And, here we are on stage winning the social media contest! If you want to see more pics from the competition, check out our @sfahorticulture Instagram page.

And, here we are on stage winning the social media contest! If you want to see more pics from the competition, check out our @sfahorticulture Instagram page.


Pin the Plant on the Triangle

This semester, one of the classes I’m teaching is herbaceous plants, and I’m taking the class beyond the usual discussions of annuals and perennials.  From studying herbaceous plant communities, one of the most useful concepts that I’ve learned in recent years is the classification of a plant’s survival strategies.  

I’ve written about it before here and here.  As a refresher, Grime pitched that plants had three strategies based on environmental factors.  

  • COMPETITORS are plants that take advantages of any and all resources they can muster.  They grow tall and wide to take out the competition.  Usually these stalwarts are perennial in nature, and they grow where stress and disturbance are nil.

  • STRESS-TOLERATORS are plants that have adaptations to ensure survival when stress arises and conditions deteriorate.  They are usually perennial and can take many years to flower from seed.

  • RUDERALS are short-lived annuals or biennials that are frequently exposed to some type of disturbance, which has selected for plants that quickly produce seed.

Usually, this strategy is visualized using a triangle (much like the soil texture triangle!) where a certain species can be shown to be—pulling some numbers out of the air—say, 70% competitor, 20% ruderal, and 10% stress tolerator based on the characteristics they exhibit.  

A figure of Grime’s triangle from Pierre et al. (2017) titled A global method for calculating plant CSR ecological strategies applied across biomes world-wide. As you can see the authors attempted to classify plants across the globe based on their t…

A figure of Grime’s triangle from Pierre et al. (2017) titled A global method for calculating plant CSR ecological strategies applied across biomes world-wide. As you can see the authors attempted to classify plants across the globe based on their tendency to be a competitor, stress-tolerator, or ruderal.

How do you take this concept from theory to application for students? Much research and data collection is needed to be able to precisely place a plant on the triangle.  Can it be done in a more simple fashion?  

After we covered the CSR theory in class, I did an activity with students.  I gave small groups (three to four) a list of seven different herbaceous plants and asked them to look up information and pictures online and try to determine where on Grime’s triangle it would fit.  I drew a triangle on the board labeling the sides and gave them markers and half sheets of paper for writing plant names.  

I then challenged them in pin-the-tail-on-the-donkey fashion (no blindfolds or sharp objects though!) to figure out where on the triangle the species would go by searching for it online.  Students looked for tendencies to spread, cover large areas, form large clumps, and/or have rhizomes (COMPETITOR); tendencies to produce copious amounts of seed, occur in areas of disturbance, and/or be short lived (RUDERAL); and tendencies to live in a stressful habitat, take a long time to flower, and/or have storage organs (STRESS-TOLERATOR).

One by one they started coming up and making educated guesses.  I stood by the triangle to offer advice and suggestions.  Some hit the nail on the head while others needed a little bit of coaxing to the right place.  

At the end, we went over the 20 or so species I provided as a challenge.  Again, I explained that while some species neatly fit into one group, some straddle the fence like Liatris elegans.  It has a corm (a stem-derived storage organ indicating some level of stress toleration) yet produces copious amounts of seed (traits of a ruderal).  

Pin the plant on the triangle—a fun game to teach students about plant survival strategies. Based on your plant knowledge, how do you think they did?

Pin the plant on the triangle—a fun game to teach students about plant survival strategies. Based on your plant knowledge, how do you think they did?

As gardeners it’s very helpful to think about flora in this way.  It helps us anticipate how plants will perform.  It explains why Gaillardia and Aquilegia don’t live long as perennials (ruderals), why Mentha and Monarda spread like crazy (competitors), and why Trillium and Narcissus  take 3–7 years to flower from seed (stress-tolerators).   It also allows us to envision how to combine plants.  Maybe put that runaway competitor in a drier spot to keep it from taking over creation?  Or, sow some ruderals in between the stress-tolerators to keep weeds down.  

If students can decide approximately which section of the triangle plants fit in during a 15 minute activity using search engines, then we can by watching how plants grow over the course of a year. 

So, that’s your homework for the season. Draw a triangle and see if you can’t plot where the species in your garden fit.

Mowing the Food Prairies

Today, we mowed the food prairies, our prototype herbaceous plantings at SFA.  I was hoping to wait till January 22nd to have a lab the first week of class and teach students about mowing naturalistic plantings.  However, with the warm weather the underplanted Narcissus × odorus had flower buds emerging from the soil.  This problem is one I outlined in detail in a previous post.  

I did get to show Anna Claire and Jevon, two of our Plantery student apprentices how mowing is accomplished.  For clearing the vegetation, I was inspired last year from a video Austin Eischeid posted to just raise a push mower on the highest setting and rev it into action.  

Jevon mows!

Jevon mows!

Anna Claire mows!

Anna Claire mows!

Some plants that lay over need to be pulled up to come in contact with the mower blades.

Some plants that lay over need to be pulled up to come in contact with the mower blades.

This year is our second mowing of the food prairies, and it went off without a hitch.  It took about 40 minutes to mow 650 square feet, but that includes some down time to refill the mower with gas.  

I prefer to mow when we can because the ground up residue provides a mulch that prevents weed growth for much of the rest of the growing season.  Even late into the fall of 2018 I was able to find ground up grass clippings from the January 2018 mowing.  

The finished product. Notice the nice layer of chopped plant residue. It is amazing to see 3 to 4 feet of biomass reduced to a few inches. The deep green clumps are Carex cherokeensis.

The finished product. Notice the nice layer of chopped plant residue. It is amazing to see 3 to 4 feet of biomass reduced to a few inches. The deep green clumps are Carex cherokeensis.

And, we were able to find Narcissus × odorus buds still intact after the cut. Mission accomplished.  

Oh, and here’s a video from last year if you want to see the process. Yes, our students do really mow that fast.

Students Showcase an Interest in Horticulture

This weekend, it was my turn to help out with Showcase Saturday, an opportunity for high school students considering SFA to come check out our school’s diversity of majors. When I’ve assisted in the past, we have at most two or three students come up to our agriculture department booth and ask questions about our horticulture program. I expected the same turnout.

But, by the time I left, we had TEN students who had came by and expressed interest in horticulture. I was amazed. From the time the event started at 1:30, I felt like I was talking to students for 45 minutes straight. One student had even come six hours from Oklahoma with her parents because she heard that our program was really good, and she was looking at it over other programs near her home! (In full disclosure, they were headed to her grandparents who lived about an hour away, but still! I was impressed!)

They came with questions about our program, what we offered and how we were different from other universities, and what career opportunities were available after graduation. Not all of them knew the word horticulture. Some came saying they were interested in growing plants or hydroponics.

After my amazement wore off from the constant stream of students interested in growing plants, my analytic scientist brain switched on, and I started asking questions such as how did you even hear about horticulture, a word that normally has low recognition amongst youngsters. The common thread was high school opportunities—classes for horticulture and/or participating in floral design or nursery competitions in FFA. These comments helped to support a trend I’ve seen of more and more high schools offering horticulture classes and doing greenhouse projects. (Even mine back in Tennessee built a greenhouse right after I left!) I would like to see some hard data, but I think there’s something there.

Time will tell if they actually decide on horticulture as a major, but the students’ comments reminded me of what I’ve been preaching. For people to engage with horticulture and plants, they have to come into contact and imbibe the wonder of plants or else this potential passion in many students may lie dormant.

Yes, we have to accept not every seed is viable. Even Aldo Leopold realized, “There are some who can live without wild things and some who cannot.” I believe the same dichotomy applies to encouraging an interest in plants and even pursuing a career in horticulture. But, visiting with the students this weekend reminded me we must be present and keep reaching out to those that love the wild green things in anyway that we can, even if their love hasn’t germinated yet. It did in me, it did in you, and it will in them.

autumn-leaves-highlands-nc.jpg

Tendrils from Speaking of Gardening 2017

NorthCarolina-IL.jpg

In August I presented with several other outstanding horticulturists at the Speaking of Gardening Symposium in Asheville, NC.  It was a terrific educational event to attend in the mountains, jam-packed with great ideas and awesome plants.  Below I offer three "tendrils", paraphrased nuggets of knowledge or interesting thoughts that you can really wrap your mind around from each speaker.  


THOMAS RAINER | PLANTING IN A POST WILD WORLD

  1. Planting design in the public sector has to be legible at 45 miles an hour.

  2. With native plants there is so much focus on where they are from but not enough on how to cultivate them.  When people plant things and then see them fail, they get depressed. They blame native plants.

  3. Use tools like plants shape and plant sociability to determine how to combine plants together.  For example, everything about Asclepias tuberosa is an adaptation to where it grows and what it grows with. Deep roots grow through grass roots, and the leaves are able to emerge through shady areas in a prairie.  

ROY DIBLIK | BEYOND THE USUAL: PLANTING THE LURIE GARDEN WITH PIET OUDOLF

  1. When planting the Lurie Garden, I wasn’t accurate.  I stepped it off.  It took a day and a half to do the site. It's not a building; you don’t have to be super accurate.

  2. Teachers come in to help maintain the plantings with students.

  3. They selectively prune the Salvia river at the Lurie Garden.  If you cut Salvia 'May Night' back, it may never bloom again that year.  'Wesuwe' is the fastest rebloomer. If you cut it back, it reblooms in three weeks.

DAN LONG | GROW UP! USING VINES AND CLIMBERS

  1. Clematis need something slender to hang onto.  For other climbers don’t put anchors right up against the wall because the wrappers can't get through that narrow space. Also, being that close to the wall results in low air circulation.

  2. Campsis likes to bloom on horizontal stems or those that droop.

  3. Tropical Aristolochia species can kill pipe vine swallowtail larvae.

PATRICK MCMILLAN | BLURRING THE LINES BETWEEN NATURE AND CULTURE AT THE SOUTH CAROLINA BOTANICAL GARDEN

  1. Every decision we make at the South Carolina Botanic Garden we ask is this good for life.

  2. BOTANICA CAROLINIANA features letters from early explorers like Mark Catesby that have first hand accounts of South Carolina that were written to Britain.  These perspectives help us understand what South Carolina looked like back many years ago and in some cases helps us find where plants were and still are today.

  3. We filmed Ruby-throated Hummingbirds and captured the fastest video footage of them ever. These birds lift themselves because they flap their wings in a figure-eight motion, which generates lift on both the forward and reverse flap.  And, as you can see at the 1:50 mark, they can fly backwards and upside down!

THOMAS RAINER | THE GARDEN OF THE FUTURE: REIMAGINING THE AMERICAN YARD

  1. Turn wall-to-wall carpeting of grass into turf rugs.  The lawn can make the planting look better. It can be a frame to the wilder areas.  Use lawns like a clearing in a meadow.  

  2. Landscape plugs are best for designed plant communities. Most plugs are grown as liners and sold to pot up; thus, liners can dry out fast in the ground.  Deep landscape plugs are longer and deeper.  Make sure that the plugs have good roots.  They can be soaked in buckets or trays before planting. 

  3. Many perennials maintain green rosettes or basal foliage during winter so that winter weeds like chickweed can't grow.

LARRY MELLICHAMP | THE WONDERFUL WORLD OF FERNS

  1. Sensitive fern (Onoclea sensibilis) gets it's name because it is sensitive to freeezing and can burn from cold temperatures.

  2. Ferns can be divided when actively growing.  SUPER IMPORTANT (His emphasis).  Do not disturb the roots and cut off leaves at same time.  You can do either/or but not both.  Broken fronds can still function well.

  3. Lycopodium spores are pyrotechnic!  Light them, and they explode!  The spores were used to make fireworks. 

ROY DIBLIK | THE KNOW MAINTENANCE PERENNIAL GARDEN

  1. First year, install the matrix, and then you keep plugging things in to enhance it over time.

  2. You can wait and plant aggressive plants like Solidago after five years to reduce their competitiveness.

  3. I spray the grass with glyphosate, and then I use a two cycle engine and auger to install the plants into the ground.

Planting the Food Prairies

This post is part 2 of 2 of a series where I reflect on our food prairie design and planting in the Sprout garden.  I hope it inspires you.

18 APRIL | TUESDAY PRE-CLASS 7:30–9:20 Am

The blank slate of the food prairies!  How exciting!  

The blank slate of the food prairies!  How exciting!  

I arrived the morning of planting at 7:30 am to set up for my Herbaceous Plants class that would help to install the food prairies as part of their class project.  Hunter, one of my incredible student apprentices, prepped the food prairie beds the week before.  He had cleared them of any debris and small weeds, broadforked them, and then leveled them.  They looked fresh and ripe for planting in the glow of sunrise.

The first task I tackled was to mark and string the boundaries for our planting grid in the prairies.  The inspiration for this tactic was a photo I saw online of one of Piet Oudolf's installations where a massive grid system was laid on the ground.  In Illustrator, I had overlaid the students' design with a grid that partitioned each food prairie into eight 4' × 4.25' quadrants and then printed each species layer.  This paper grid would correspond with the one I was hammering into the ground to simplify plant placement for the students.  I printed several of these so that the students could use them as guides.  I installed stakes to mark the intersecting lines and used twine to demarcate the boundaries of our quads.  John and Rock, two other amazing student apprentices, arrived just in time to help with the stakes and string.  We outlined two of the four prairies for a demo before it was time for class to start.  I had students in class help on the other two.  

 
The food prairie design for the structural layer (plants listed above the design) and seasonal filler layer (plants listed below the design) is a kaleidoscope of color.  Here the four quadrants separated by thick black lines are shown together …

The food prairie design for the structural layer (plants listed above the design) and seasonal filler layer (plants listed below the design) is a kaleidoscope of color.  Here the four quadrants separated by thick black lines are shown together instead of as their separate beds for ease.  Circles approximate—and let me stress approximate as some species will spread—the final plant size.   


The other thing I did before students arrived was place stakes with species names on them in the garden.  That way, when students brought the trays up to the garden, they could put each species in its corresponding place.  The labels helped us be very organized as I knew trouble finding small plants or accidentally grabbing the wrong plant could cause chaos.


18 APRIL | TUESDAY CLASS 9:30–10:20 am

I knew it would rain.  I had been planning the food prairie install for a year and a half, and the reoccurring fear I had was that some stalled front would dump 10 inches on us all week. 

I walked into the classroom to get the students, and the minute we walked outside, the wet stuff began to fall.  It wasn't a monsoon.  More like a light shower, barely above a mist.  However, the students didn't complain besides the occasional, "I'm cold."  

I sent a few students to get the plant trays, and I stayed on Sprout hill to help others begin laying out the stakes and string.  Most everything we planted was either a 3.5 inch pot or smaller save for a few species that we dug and divided. 

Once the grids were finished, I began to show students how to read the plans from our design.  I indicated that a plant needs to go roughly where it was on the design in its appropriate grid, but to the exact inch was too tedious.  Piet Oudolf and Noel Kingsbury say in Gardens in Time and Space location matters less than the plant pallete as these designs can and will change over time. 

The food prairie grid and food prairie design for Symphyotrichum oblongifolium 'Raydon's Favorite' (aromatic aster).  The red, purple, green, blue, and orange circled plants on the left correspond with the circled plants in the design on the ri…

The food prairie grid and food prairie design for Symphyotrichum oblongifolium 'Raydon's Favorite' (aromatic aster).  The red, purple, green, blue, and orange circled plants on the left correspond with the circled plants in the design on the right.  As you can see from the plant placement on the left, students were very adept at finding each propagule's final spot.    

Plants goin' in the ground!  

Plants goin' in the ground!  

I also told the students to not walk on the beds.  I knew with around 20 species to install and 12–14 students helping there would be lots of soil compaction.  Therefore, I encouraged them to use stepping stones as landing pads.  I must compliment them.  They were very diligent about caring for the soil, even when I wasn't looking.  :-)  

These plastic stepping stones helped us prevent excess soil compaction.  

These plastic stepping stones helped us prevent excess soil compaction.  

Since the class was only an hour, we did a trial run installing two species.  The rest would wait for lab.  I was immediately impressed with the students' collective ability to read and interpret the plan.  They worked in pairs and helped each other find where plants went. 


18 APRIL | TUESDAY LAB 1:00–2:50 pm

For lab, we were able to hit the ground running since the grids were in place and most of the plants were on site.  I made comments about it not raining, to which some of the students griped that I was jinxing us all!  Fortunately, it didn't rain another drop for the whole project.

We started by digging a few structural-layer plants like Asparagus officinalis (asparagus) and Rudbeckia maxima (great coneflower) we propagated in the ground for the install.  At first, I checked the students work against our design, and once I saw they were able to follow the design, I let them work on their own.  Overall, we were able to install 13 species today, and we got the majority of the structural and seasonal filler layers installed. 

The chaos of creation

The chaos of creation

Teamwork makes the dream work.  

Teamwork makes the dream work.  

 
Photo from the end of day 1.  From this overhead shot of two food prairies in the midst of our cut flower and vegetable beds you can appreciate how the grid system helps students visualize where plants go.  

Photo from the end of day 1.  From this overhead shot of two food prairies in the midst of our cut flower and vegetable beds you can appreciate how the grid system helps students visualize where plants go.  


20 APRIL | THURSDAY CLASS 9:30–10:20 am

This morning, we continued to plant other components of the seasonal layer.  We also started planted dynamic fillers like Gaura (Oenothera) lindheimeri 'Sparkle White' (Lindheimer's beeblossom), Oenothera biennis (evening primrose), and Gaillardia aestivalis var. winkleri (Winkler's firewheel), and I had a few students start plugging in Carex cherokeensis (Cherokee sedge) that would comprise the groundcover layer.  

After I got them started, I climbed on top of the building and sneaked a few aerial shots.  

 
Hehe, they didn't even know I was on the rooftop for a while.  

Hehe, they didn't even know I was on the rooftop for a while.  


From the rooftop, I saw Donna McCollum of KTRE filming students planting, and I came down to greet her.  I was excited that she came out to feature these perennial projects our students were installing at SFA.  Plus, the students were planting these garden beds the week before Earth Day, and they were able to discuss the sustainability of the plantings for the clip.  She asked me some questions, and then she interviewed several of the students.   Here's her segment if you'd like to watch

A rare photograph of me teaching as Donna McCollum films a piece on the food prairie plantings.  Photo by Hunter Walker.

A rare photograph of me teaching as Donna McCollum films a piece on the food prairie plantings.  Photo by Hunter Walker.

Donna McCollum of KTRE interviews SFA Horticulture student and Team Sprout member Hunter about the food prairies. 

Donna McCollum of KTRE interviews SFA Horticulture student and Team Sprout member Hunter about the food prairies. 


04/25 | TUESDAY CLASS 9:30–10:20 am

The food prairies were really becoming full of flora.  Today, our main objective was the matrix layer—Carex cherokeensis, Bouteloua curtipendula (sideoats grama), and Sisyrinchium angustifolium (blue-eyed grass).  At this point it was mainly filling in open spaces that we hadn't filled yet with other flora, and we mostly completed two of the four food prairies this morning.  Also, towards the end of the hour, I had a student begin plopping Narcissus × odorus (campernelle) bulbs into the food prairies according to our design.  

Bouteloua curtipendula plugs lay scattered in vacant areas in the food prairies.  

Bouteloua curtipendula plugs lay scattered in vacant areas in the food prairies.  

 
Even a broken leg doesn't stop students like Cierra from helping plant!

Even a broken leg doesn't stop students like Cierra from helping plant!

 
Reagan smooths soil around Sisyrinchium angustifolium.  The sun came out long enough for the plants to open their beautiful blue flowers.  

Reagan smooths soil around Sisyrinchium angustifolium.  The sun came out long enough for the plants to open their beautiful blue flowers.  


04/25 | TUESDAY LAB 1:00–2:50 PM

We picked up where we left off this morning on the groundcover layer.  And, just like that it was finished!   

Wa-hoo!  The food prairies are planted!  

Wa-hoo!  The food prairies are planted!  

Or, should I say it's just begun since they will change and evolve over time? 

Later in the week, a few of my student apprentices applied a thin layer of mulch to reduce weed germination.  Of course, we want the plants to grow thickly enough to shade the soil so weeds won't have much of a chance, but this initial covering will help the installed plugs gain a solid footing.  

Watering in the students work.  We removed the grid overlay after the install was finished.  

Watering in the students work.  We removed the grid overlay after the install was finished.  

In the end I believe that this type of planting is great for students because of the randomness to it.  They were very capable of following the design, and if they didn't put the plant in the exact spot, it's ok. In total with everyone's help, I roughly calculated that we invested approximately total 80-90 hours in the project for planting and installation.  

SFA students happy to be finished and happy to have a positive impact on the world.  The food prairies will add beauty to the garden and provide habitat for a number of beneficial insects.  

SFA students happy to be finished and happy to have a positive impact on the world.  The food prairies will add beauty to the garden and provide habitat for a number of beneficial insects.  

Now, we wait and watch as the food prairies burgeon with growth.  

Designing the Food Prairies

As a educator, I find the process of learning fascinating.  Maybe even you've caught hints of the magic.  When you're really passionate about a topic, it's like your brain turns into a sponge as you soak up every drop of knowledge, and wring it all back out again to transform something, some surface of existence that needs a good scrubbing.  Read and study all you want, but at some point you have to go and do.  

Heaven knows that's me with mixed plantings.  Probably since 2012 when I first heard Claudia West speak at PPA in Boston or 2013 when I travelled to the Netherlands with Piet and Noel's book in hand, I've been reading about designed plant communities and standing on the shoulders of giants as I've accrued knowledge from those eager to share their craft of interpreting nature. 

I made a special point to visit this park in Leuvehoofd in Rotterdam at a conference in the Netherlands a few years ago.  It was the first Oudolf installation I ever saw, and it was enlightening seeing plants intermingled.  

I made a special point to visit this park in Leuvehoofd in Rotterdam at a conference in the Netherlands a few years ago.  It was the first Oudolf installation I ever saw, and it was enlightening seeing plants intermingled.  

I wanted to do something with all I had absorbed.  Since 2015, I have been working on designing mixed plantings in the Sprout garden at SFA that we've deemed the food prairies.  Like I shared in a previous post, I wanted to have these plantings in the Sprout garden because of the benefits—they would add beauty to the garden, they would help to attract beneficial insects, and let's be honest, I love the prairie-look.  AND, I wanted to teach and educate our students about the design, the installation, and the management of these style of plantings.  Much of the work on synthesizing these planting combinations has been done in the north or abroad, and we need to adapt the methodology for the southern US.  

I started by drawing and iterating several different designs for the food prairie beds.  The design that won was to have four beds, two on either side of our primary axis path totaling a little over 600 square feet of planting space.  The plantings would be in-between our food growing areas, thus dividing the garden into thirds.  I was inspired by Piet Oudolf's work at Scampston Hall where Deschampsia cespitosa (tufted hairgrass) segregated patches of lawn.  This design resonated with me, perhaps because most of my life I grew up around fence rows that partitioned the landscape.  Additionally, our mini fence rows amplify the reclaimed farm theme I'm going for around the SFA agriculture building. 

Decisions on plant material came next.  Initially, I considered adding a few shrubs, but after reading Planting in a Post-Wild World, I nixed them.  Thomas and Claudia argue that open spaces like our full sun slope call for the grassland archetype and herbaceous species should dominate.  Additionally, woody material would likely dominate the space, and the absence of shrubbery would aid maintenance and early season clean up with our student apprentices. 

Since my arrival in Nacogdoches, I documented when species were in flower and how long their ghosts persisted in the landscape.  I had a steep learning curve to climb as the flora of Texas bloomed a month or two earlier (or later in the fall!) than where I lived in Tennessee or North Carolina.  

In the fall of 2015, the students and I installed trial material from Hoffman Nursery, Intrinsic Perennials, and Jelitto to see which species would fare well.  Since we were overhauling the entire garden, I decided to grow them on site.  These evaluations helped to lengthen the plant list that follows, especially for the species comprising the matrix. 

The list of species for the food prairie that I would eventually share with my students.  L = leaf, F = flowering, and S = seed or senescence.  Overall, colors *roughly* match the species, but white was coded as gray so that it would be vi…

The list of species for the food prairie that I would eventually share with my students.  L = leaf, F = flowering, and S = seed or senescence.  Overall, colors *roughly* match the species, but white was coded as gray so that it would be visible on a white background.  

Early on in the design process, I knew that the installation would be perfect for my Herbaceous Plants class slated for the spring of 2017.  Many regale this type of planting as the future of horticulture in urban areas, and I'm not going to have my students left in the dust. 

SFA students in Herbaceous Plants learning how plants grow in nature. Exciting times!!!

SFA students in Herbaceous Plants learning how plants grow in nature. Exciting times!!!

I began developing curriculum to teach the concepts of mixed plantings.  For our first lab, I took an idea that Angela Treadwell-Palmer shared with me that she did in school under W. Gary Smith—take students out to observe how plants grow together in nature.  They got to see the patchwork quilt of flora and how plants actually grow in the wild—randomly following environmental gradients, arranged in layers, and sans mulch but smothering the ground with foliage. 

Also, early in lab we began propagating plants for the food prairie to allow them time to grow and develop for our late April install.  Stock plants of Pycnanthemum tenuifolium (narrow-leaf mountain mint), Symphyotrichum oblongifolium 'Raydon's Favorite' (aromatic aster), and Allium tuberosum (garlic chives) were ripped apart by green fingers, and the divisions grew to the surprise of a few students.  And, Echinacea cultivars (purple coneflower), Oenothera biennis (evening primrose), and Achellia millefolium (yarrow) seed were sown and germinated promptly.  

In class, we discussed concepts about ecology to reiterate the growth patterns plants exhibit in nature like survival strategies, succession, and colonization.  We covered mixed plantings, why this approach is becoming more prevalent, and how to do it.  We covered the layers—structural, seasonal filler, matrix, and dynamic filler.  And, then I had the students design and develop a small modular design much like Roy Diblik presented in his book The Know Maintenance Perennial Garden.  One student even went as far as developing a module where she used the ten digits in the number pi to arrange her 10 species in her module.  (Great example of soaking it up and wringing it out, eh?)

After we covered all this material, we set about in lab designing the food prairies.  I created a 1 in = 1 ft scale drawing showing the four food prairie quadrants, and had students cut out 1, 2, or 3 inch squares to correspond with the rough maximum plant size each species would get.  On these squares students used markers to color and code an abbreviation for each species.  Then, they came up and added them to the drawing, I voicing advice all the way about which plants would look good together and which ones for which layer.  Once we were finished, I photographed the design and imported it into Adobe Illustrator where I overlaid the squares with circles.

Students in Herbaceous Plants plan and arrange the structural (left) and seasonal theme (right) layers for the food prairies.  

Students in Herbaceous Plants plan and arrange the structural (left) and seasonal theme (right) layers for the food prairies.  

I'll admit the first time we did this I encouraged them to put WAY too many plants on the design sheets.  I had to cull some of the squares they placed but, by the end the numbers closely matched the design percentages from Planting in a Post-wild World and notes I took in a Cassian Schmidt talk. 

I showed students the final design, and we set the week of April 17-21 for the install. 

— CHALLENGES —

While I did much prep in the year and a half prior, the biggest challenge I faced was cramming the design and synthesis of mixed plantings into a 3 month period, from the first day of class to the install.  Doing a design by yourself is testing enough, but try organizing things well enough to have 12 other people help!  It's a whole 'nother endeavor.  But, the teacher in me enjoyed it and reveled at the light bulbs going off in class and lab as I exposed the students to the full gamut of the design and install of mixed plantings.  I didn't want to give them a fish; I wanted to show them how to use the bait and tackle. 

I'll also admit I had fears, which I've learned is common when you make the shift from traditional plantings to this novel approach.  Fear of failure.  Fear of the unknown.  Fear of weeds.  Fear of too many plants being used.  Fear of too few plants being used.  Fear of the propagules not being big enough.  Fear of this planting not being in my backyard but other there for the world to see. 

But, as most things are in life, if you don't have angst doing a project and you don't feel resistance, it probably means the task is not worthwhile. 

Now with all that we've learned, let's go plant it.  The install, Part 2, is coming soon. 


Food Prairies

I love the look of a prairie.  I'm not sure when the adoration began, but my earliest memory of taller-than-turf grasses is as a child walking on the back hill at my grandparent's house where my great-grandfather had allowed the vegetation to grow wild for a few seasons. 

I can see it now—my head barely bobbing out of the ocean of amber broomsedge (Andropogon virginicus) as I trod along the paths I had tromped down.  It. Was. Fun. 

While the prairie at my grand-parents house is long gone, seeing grasslands like this one basking in the glow of sunset brings back memories of my childhood prairie rambles.

While the prairie at my grand-parents house is long gone, seeing grasslands like this one basking in the glow of sunset brings back memories of my childhood prairie rambles.

Parts of west Tennessee actually used to be tallgrass prairie, and that little patch of broomsedge on the hill was remnants of that ecosystem being expressed.  Now, it's uncommon to find a large patch of tallgrass in west Tennessee since much of the land is farmed.  You instead see traces of the prairie along the roadside and in fencerows, mere borders of the angular, agricultural puzzle pieces that cover the countryside.  Still, even these little slivers can be inspiring to a horticulturist such as myself, and on my driving trips to and fro, my eyes scan the open roadsides (very safely of course!) for plant patterns and new species. 

I believe this love of grasslands is why I have gravitated toward designed plant communities and mixed plantings of perennials that have really taken off within the past few years.  Seeing that people were actually wanting to create designed grasslands was and is thrilling for me as a horticulturist.  And, to be able to go and experience some of these designs over the past few years has been enlightening.  Inspiring.  Exciting. 

Piet Oudolf's Hummelo, a central nexus for the mixed planting movement. Here, grasses and forbs seamlessly intermingle together and appear as if planted by nature. From my reading of Hummelo, I learned this planting where the nursery used to be is m…

Piet Oudolf's Hummelo, a central nexus for the mixed planting movement. Here, grasses and forbs seamlessly intermingle together and appear as if planted by nature. From my reading of Hummelo, I learned this planting where the nursery used to be is mainly derived from a seed mix.

Flowering Echinacea (purple coneflower) and verdant Amsonia hubrichtii (threadleaf bluestar) on the High Line provide a foil to the metallic cityscape of New York City.

Flowering Echinacea (purple coneflower) and verdant Amsonia hubrichtii (threadleaf bluestar) on the High Line provide a foil to the metallic cityscape of New York City.

The rectangular meadow patches at Le Jardin Plume in France are anything but square.

The rectangular meadow patches at Le Jardin Plume in France are anything but square.

Eryngium yuccifolium (rattlesnake master) and Kniphofia 'Wet Dream' (red hot poker) erupt from the haze of muhly (Muhlenbergia capillaris) at Chanticleer's elevated walkway.

Eryngium yuccifolium (rattlesnake master) and Kniphofia 'Wet Dream' (red hot poker) erupt from the haze of muhly (Muhlenbergia capillaris) at Chanticleer's elevated walkway.

Now, I'm wanting to learn more about how do we create and employ these mixed plantings in the southeast US.  Much of the approach has been developed in regions further north, and I believe that the technique needs to be trialled and tweaked for the south.   Our habitat is different, our climate is different, and our species composition is different. 

And, in an attempt to learn, this semester my students and I will be designing grassland-style plantings in the Sprout garden on the campus at SFA.  With Sprout we focus on creating tangible growth for plants, students, and the community to bridge the gap between horticulture and people.  So far, we have found relevance with students and the locals though our growing food and cut flowers.   And, now part of this garden will be planted to provide food for beneficial insects like pollinators and predators.  Students care about sustainability, and designed plant communities are considered a more sustainable approach to landscaping

We call these areas food prairies, since the garden has been designed with food in mind AND because the areas will provide food and habitat for beneficial organisms.  The name arose one day in a conversation with my colleague Dawn Stover, another meadow aficionado.  I was telling her about how I wanted to plant perennials in the Sprout garden to make it more beautiful and to add habitat and resources for beneficial organisms, and she commented on how we would have food for people and food for our insect friends.  From that conversation, the name for these plantings just clicked.    

Of course, to know what will grow well in mixed plantings in the southeast, we must evaluate plants. Thanks to trial material from Hoffman Nursery, Intrinsic Perennial Design, and Jelitto we've been able to assess many different species in unofficia…

Of course, to know what will grow well in mixed plantings in the southeast, we must evaluate plants. Thanks to trial material from Hoffman Nursery, Intrinsic Perennial Design, and Jelitto we've been able to assess many different species in unofficial trials like you see here.

Since the Sprout garden is designed to resemble a reclaimed farm, the prairies will fit in quite nicely with our overall theme by resembling fencerows between fields.  After all, most agrarian areas have some type of wooly part or "idle spots" as Aldo Leopold called them where wildflowers and grasses bloom in the absence of disturbance.  Usually, these areas are rejects and castaways, but in our garden this flora will be planted on purpose.  Plus, research shows that having fencerows that have been enhanced with pollen- and nectar-rich plantings can reduce pest pressure in surrounding fields.  

I'll keep you posted on the food prairie's progress.  Conceptualizing them and designing them is exciting. The whole process makes me feel like a kid again.