Chillin' for a Peach Fillin'

My first peach tree is flowering.  ‘Flordaking’—and, yes, there is not an i missing. The name gave me pause the first time, too—arrived last fall in a six-foot-long box. Upon opening said package, to my surprise a six-foot-tall Prunus persica was inside.  I guess that’s what happens when you buy a five-gallon tree.  

 
Present, past, and future flowers of ‘Flordaking’ peach

Present, past, and future flowers of ‘Flordaking’ peach


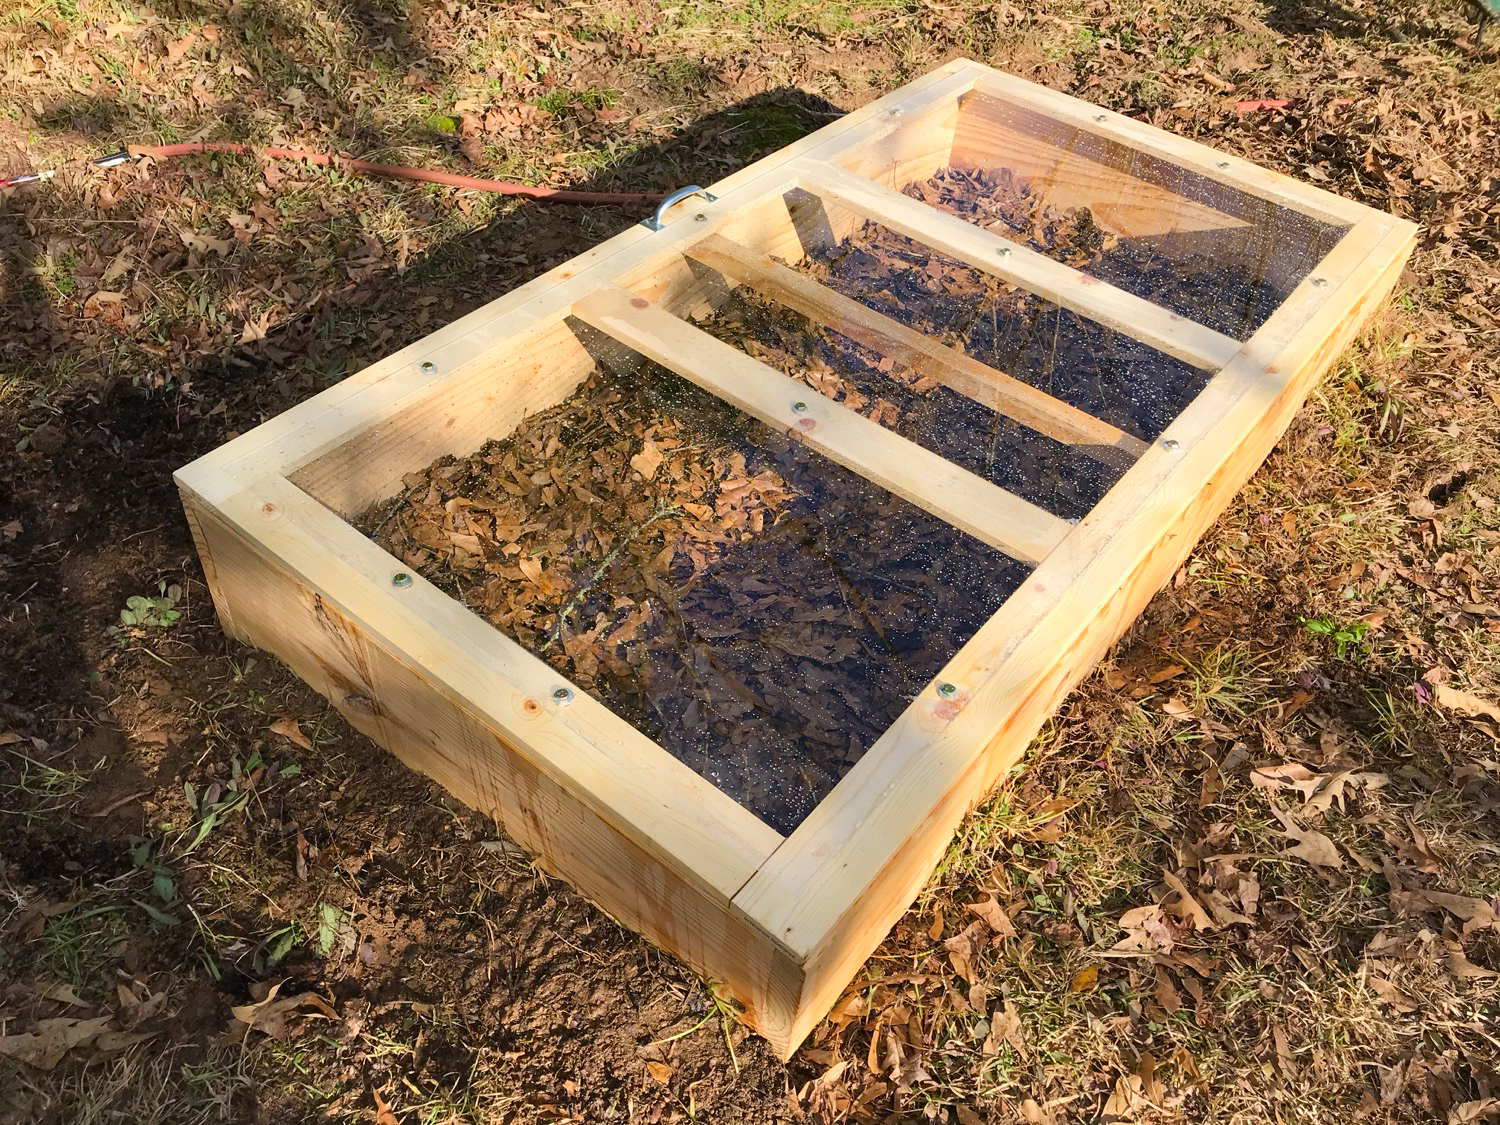
I sited it in our edible patch.  I had initially set aside this approximately 100 × 100 ft fenced area to be an orchard, but after mental iterations, it became clear after some damage from deer, boar, rabbits, and armadillos that the area would be better suited for more annual production since they were obliterated elsewhere.  I slated the back third edge-habitat area for fruit trees, and the rest of the front was for cut flowers and veggies.  

While I’m more of a nectarine person myself, Karen likes them; therefore, in the orchard a peach went.  The reason I chose ‘Flordaking’ is because of its low chill requirement.  In horticulture we talk about chilling hours as a measure for how much cold a plant must receive before it flowers, and while there are different approaches to calculate that number, let’s say that we count the hours under 45F.  

I teach students that a tree’s chill requirement is an alarm clock. It is a wonderful adaptation that some temperate trees have to the extreme stress of being exposed to cold temperatures in the winter.  Just like some people need 6 hours of rest and others need 8 (…or 10), some peaches need a few hundred hours down south while others further north require 1000 hours.  

Chilling causes sugar levels in the trees to increase and hormone levels to change.  The tree must be exposed to a certain amount of chilling to be able to flower.  If not enough chilling is perceived, then the plant can’t flower because enough metabolic changes haven’t occurred yet.  The alarm clock hasn’t gone off and the tree can’t wake up.  In fact, planting a high chill requirement tree in the south where we have warm winters every so often may result in the plant being extremely delayed in growth.  

‘Flordaking’ is estimated to need about 400 hours of cold.  Released by the University of Florida in 1978, it’s touted to be one of the best varieties for us to plant in zone 8.  

 
A honeybee dusted with pollen. For fun, notice how the stamens (filament structures) change from orange in a new flower opening to yellow where they are shedding pollen.

A honeybee dusted with pollen. For fun, notice how the stamens (filament structures) change from orange in a new flower opening to yellow where they are shedding pollen.


The appearance of petals in recent weeks indicated that the snooze wasn’t pushed. Instead, the tree is rising and shining. It is pure delight to watch the petals unfurl.  The other afternoon I stood and watched a bee work the sparse flowers on the little tree in the waning light.  It wasn’t very skittish and allowed me to get close and observe it swimming in the stamens to get the nectar at the center. While peaches are self-fertile and one tree will produce fruit, I’m going to add another one or two to the patch for some diversity.  

This list has been helpful picking some low chill varieties for our garden.  Maybe it’ll help you, too.  

Sowing Perennial Seeds

With the arrival of February and warmer temperatures, I've been sowing seeds in earnest this week, perennials in particular.  Seeds purchased or collected last year have the chance to sprout.  My goal is to get them started for easy propagation in years to come for planting prairies here at the house.  

Two species that I've had stratifying—a cool moist period to enhance germination in some species—in the refrigerator are Asclepias tuberosa 'Wild Orange' and Echinacea sanguinea.  I've checked on them weekly in the little baggies by opening the moist paper towels and inspecting them.  It's a nice way to also introduce some fresh air in the sealed vessels since seeds need oxygen for germination.  For the Asclepias, I noticed swelling in the seeds and some rupturing of the seed coat, a clear indication they were ready for planting.  The Echinacea seed held onto their dingy off-white color while the other detritus from the seed head turned black.  

Plump Asclepias tuberosa seeds. Seed the tinge of light yellow? The seed coat has ruptured on one near the center.

Plump Asclepias tuberosa seeds. Seed the tinge of light yellow? The seed coat has ruptured on one near the center.

Echinacea sanguinea seed were mixed in with parts of the flower head. I decided to stratify them together and pull the seeds out when sowing.

Echinacea sanguinea seed were mixed in with parts of the flower head. I decided to stratify them together and pull the seeds out when sowing.

These made their way into seed trays earlier this week.  With the Asclepias I was sure to sow the seeds in a tray deep enough (approximately 5–6 inches) to allow their roots to grow down.  Allen Bush shared with me that shallow trays can cause their demise because the root doesn't have enough room to grow down.  

Along with the seeds that have been chilling in the fridge, I also scarified some seed this week and allowed them to soak for a couple of nights to prep for planting.  Scarification damages the seed coat and allows water to enter.

Last August, I collected some Baptisia sphaerocarpa seed from a location I saw it blooming several years prior.  Fingernail clippers make quick work breaking the seed coat on a few seeds.  

A few roots began to appear on Baptisia sphaerocarpa.

A few roots began to appear on Baptisia sphaerocarpa.

Another species that I scarified was Amsonia tabernaemontana.  The seed came from my dad.  Years ago, I found an Amsonia blooming on the roadside near home.  The fear that it would succumb to the mower or herbicide like I had witnessed happen to many other plants inspired me to relocate the clump to our yard.  It settled in nicely and started producing seed.  A year or two ago, I asked my dad to collect any fruit he saw, and that Christmas I returned home to find the baggie on the windowsill.  Now that I have a house of my own, I felt it time to try growing the northern provenance here.  The germination requirements were unknown to me; however, from a quick google search, I discovered researchers at UGA demonstrated that clipping the end of the seed would allow moisture in to kickstart the germination process.  

Amsonia tabernaemontana seedlings emerged from an intriguing cigar-shaped seed. With the embryos popping out, they look like sea tube worms.

Amsonia tabernaemontana seedlings emerged from an intriguing cigar-shaped seed. With the embryos popping out, they look like sea tube worms.

Today the seeds are in the garage instead of their cold frame.  The forecast showed below freezing last night, and I didn't want to take any chances since I've worked hard to get them all started.  Here’s to hoping they all germinate!


An Auger, The Best Purchase of 2018

One of the best purchases I made last year was an auger that I could attach to a cordless drill, a thought that hit me as I was dividing abandoned ‘Grand Primo’ Narcissus I discovered on an abandoned backroad.  Two clumps became 107 bulbs in a matter of minutes, and I wanted to get them in the ground as soon as possible. The auger and drill came out, and the task was completed in under an hour.

Narcissus tazetta ‘Grand Primo’ is one of the few Narcissus that is very persistent in the deep south. Scapes are adorned with over half a dozen petticoat-shaped flowers. Note other attributes like bright orange pollen and the corona that fades from…

Narcissus tazetta ‘Grand Primo’ is one of the few Narcissus that is very persistent in the deep south. Scapes are adorned with over half a dozen petticoat-shaped flowers. Note other attributes like bright orange pollen and the corona that fades from butter yellow to off-white over time.

The ingenious idea was from Thomas Rainer.  We both were presenting at the Speaking of Gardening event in Asheville two years ago, and he mentioned getting one for planting the deep-rooted landscape plugs.

Several months later, I remembered browsing Amazon one night to purchase the thing.  When it came, I tried it out, and I was immediately impressed.  As someone who suffers from carpal tunnel in my wrists, using a trowel over and over again leaves my hand in pain after planting.  Now, I hook the auger up to a cordless drill, zip zip zip, and I’m ready to plant 50 plugs! I find that even the three-inch pot size will easily fit into a shallow excavated hole.

We bought one for school, and the students immediately fell in love with it, too.  I also convinced my parents to get one for planting bulbs.  

The biggest problem I encounter using the auger is roots.  In plain soil, it will go down without a problem, but roots often cause it to jerk around or just stop.  Also, safety note:  I find it best to hold it with both hands.  If you’re concerned about it whipping on you, get one of the two-handled drills.  I would especially recommend that option if you use a corded drill.

I know many advise dividing Narcissus once dormant, but I’ve had success moving them in the green. In this image you can see the circular holes made by the auger and my attempts to get the bulbs to the same depth. After sticking them in the hole, I …

I know many advise dividing Narcissus once dormant, but I’ve had success moving them in the green. In this image you can see the circular holes made by the auger and my attempts to get the bulbs to the same depth. After sticking them in the hole, I use a hoe to replace the soil back.


Flaming Broomsedge Seed

A big reason I built a cold frame was to protect sown seeds from heavy rains and the critters that dig around in the seed flats.  So, now it’s time to get sowing!

One of my foci for 2019 are grasses.  Getting these started from seed and dividing already existing plump clumps will allow me to start planting groundcover species that will shade the soil much of the growing season.  I also like how at the beginning of the growing season when grasses are mown, they generate a nice mulch layer to keep weeds down.  

Last fall, I collected grass seed from up and down the roadside as well as in the garden here, and now I’m sowing Andropogon, Muhlenbergia, and Eragrostis.  

For Andropogon virginicus (broomsedge), seed actually benefit from a stratification treatment (exposing seed to cold and moist conditions); therefore, sowing them sooner rather than later will take advantage of the cold weather coming.  I collected some culms filled with seed and allowed them to dry in a brown paper bag on our back porch.

Then, I took a five gallon bucket and shook the seed loose in it.  Andropogon seed have hairs on the pedicel and rachis internode that allow them to catch a breeze and spread; such airborne packages are called diaspores (a seed and everything that aids dispersal).  These can be problematic when sowing a tray.  

I had heard Roy Diblik say that the plumes of Asclepias (milkweeds) could be removed with a flash fire.  With the seed in the bucket, I grabbed a lighter and lit the plumes on fire.  It quickly burned and left me with a pile of seed ready for planting.  Andropogon is fire adapted, and the flash burn probably didn’t damage any seed.  (NOTE:  As with anytime you are using fire, make sure you practice safety!)

I’ll update you in a few weeks to see how germination is progressing.  

Constructing a Cold Frame

This weekend, I built a cold frame.  The project has been on my wish list for a while.  I’ve had issues with getting seeds started with our couple-times-a-year gully washers.  This simple structure will provide me with protection from rain to start perennial and cool-season annuals with the added bonus of a couple degrees of extra warmth at night.

I had in mind what I was trying to construct since I built them as a teenager back in Tennessee based on Eliot Coleman’s designs.  A walk around the hardware store, and I was able to piece together my project.  I decided on a smaller size (3 × 6 ft) than my usual 4 × 8 ft because that 18 sq ft was the largest pane of plexiglass I could find.  I also chose pine as my wood. There’s a cedar lumberyard about an hour away, and for future frames I’ll use that wood. But, I was in a hurry to get it built before the semester started, and it will work well for a few years.

 
First step before building the box was to build the wooden frame to the piece of plexiglass to create a light, the name of the pane of glass on a cold frame. You want to make sure that the light fits the box snug.

First step before building the box was to build the wooden frame to the piece of plexiglass to create a light, the name of the pane of glass on a cold frame. You want to make sure that the light fits the box snug.

 
Here’s the light constructed with the plexiglass attached to the wooden frame. I used braces on the joints to make sure it stays sturdy. I used a PVC-rated drill bit and drilled slowly into the plexiglass. The guy at the hardware store told me to le…

Here’s the light constructed with the plexiglass attached to the wooden frame. I used braces on the joints to make sure it stays sturdy. I used a PVC-rated drill bit and drilled slowly into the plexiglass. The guy at the hardware store told me to leave the protective coating of plastic on the glass to help drill through it. If the protective layers are absent, he said a piece of tape would help to protect the glass from shattering when drilled.

 
A bolt and washer hold the plexiglass on the wooden frame, and to the right is a handle for the light.

A bolt and washer hold the plexiglass on the wooden frame, and to the right is a handle for the light.

 
I constructed the box out of two ten-foot long 2 × 12’s cut into two pieces—6 ft long for the front and back and 3 ft long for the sides. To create a slope on the top of the box to maximize sun exposure, I cut 4 in off one of the 6 ft boards to make…

I constructed the box out of two ten-foot long 2 × 12’s cut into two pieces—6 ft long for the front and back and 3 ft long for the sides. To create a slope on the top of the box to maximize sun exposure, I cut 4 in off one of the 6 ft boards to make it 8 in tall, and for the side boards, I cut a slant (1.3 in drop per 1 ft board length). Once constructed on the ground, the cold frame is turned over so that the front and back boards have a slight slant in one direction and so that the top is flush with the light. Notches made in the middle front and back allow the installation of a support beam.

With the ground cleared, a nice mulch of leaves will help to keep weeds down and support the trays to keep them from sitting on the ground.

With the ground cleared, a nice mulch of leaves will help to keep weeds down and support the trays to keep them from sitting on the ground.

Finished product!

Finished product!

It was a quick project and only took me 3 hours to make. The total cost of supplies was around $160 to cover 18 square feet (~8.90 per square foot), which is cheaper from most of the models on the market. If I could do it over again, I would try to figure out a way to reduce the size of the cross beams across the light that block some of the solar radiation. Soon, I’ll also add strips along the bottom of the frame to help protect the wood from rotting, which is another suggestion from Eliot Coleman’s design. I also want to attach the light to the box and cut a notched piece of wood to open the frame to the desired height during the day.

But, overall I’m pleased with how it turned out, and I look forward to having better success growing plants.

Goatweed Leafwing

I was in our edible patch this afternoon when a flicker of crimson silently swooped past me. I was surprised and caught off guard to see a butterfly circling. At first glance I wondered if it was a Gulf Fritillary. However, it didn’t match my mental image of one, and it is winter.

It landed near the fence, and I went over to investigate. At one point, it sensed me. The frail creature played dead and closed its wings to reveal incredible camouflage! It looked just like the fallen leaves around it. I snapped some pictures and took some video to try to identify it before I helped it get airborne again. A quick google search revealed I had encountered a winter form of Goatweed Leafwing, a name that sounds more like random words shouted in charades than a gorgeous and fascinating butterfly. The summer form’s color is a bit more drab orange.

Amazing, eh?! Look at how the Goatweed Leafwing looks just like the oak leaves around it. Its pinnate and reticulate venation pattern game is strong.

Amazing, eh?! Look at how the Goatweed Leafwing looks just like the oak leaves around it. Its pinnate and reticulate venation pattern game is strong.

Eventually, it landed in an eastern red cedar. And, I leaned over a barbed wire fence and held the camera high to try to get some good detail of the Goatweed Leafwing.

Eventually, it landed in an eastern red cedar. And, I leaned over a barbed wire fence and held the camera high to try to get some good detail of the Goatweed Leafwing.

The name describes both its plant host and plant mimicry. Goatweed (aka Croton capitatum) is the larval food source along with Texas croton (Croton texensis) and prairie tea (Croton monanthogynus). That’s it for plant hosts, which made me ponder planting some weedy Croton in my yard. Only for a second, though; it is everywhere along the roadsides. The leafwing part alludes to the underside of the wing resembling fallen foliage.

I spent part of the rest of the afternoon thinking about how in the world does an insect that’s a host on one herbaceous plant evolve to look like a dead tree leaf? Research supports that it occurred step by step in Kallima, another butterfly that resembles a dead leaf. (Here’s the official paper or the National Geographic CliffsNotes version.) That’s likely the case with my new friend. These leafwing mimics evolve a bit to look like a leaf, which decreases the chance they’ll get eaten. And, over time, these changes accumulate. A line that looks like a vein here, a reticulate vein pattern there, and less and less adults get eaten.

Discovering this species today filled me with wonder and helped me better understand the ecological history of this area. It was a fun find for a gray day.

Mowing the Food Prairies

Today, we mowed the food prairies, our prototype herbaceous plantings at SFA.  I was hoping to wait till January 22nd to have a lab the first week of class and teach students about mowing naturalistic plantings.  However, with the warm weather the underplanted Narcissus × odorus had flower buds emerging from the soil.  This problem is one I outlined in detail in a previous post.  

I did get to show Anna Claire and Jevon, two of our Plantery student apprentices how mowing is accomplished.  For clearing the vegetation, I was inspired last year from a video Austin Eischeid posted to just raise a push mower on the highest setting and rev it into action.  

Jevon mows!

Jevon mows!

Anna Claire mows!

Anna Claire mows!

Some plants that lay over need to be pulled up to come in contact with the mower blades.

Some plants that lay over need to be pulled up to come in contact with the mower blades.

This year is our second mowing of the food prairies, and it went off without a hitch.  It took about 40 minutes to mow 650 square feet, but that includes some down time to refill the mower with gas.  

I prefer to mow when we can because the ground up residue provides a mulch that prevents weed growth for much of the rest of the growing season.  Even late into the fall of 2018 I was able to find ground up grass clippings from the January 2018 mowing.  

The finished product. Notice the nice layer of chopped plant residue. It is amazing to see 3 to 4 feet of biomass reduced to a few inches. The deep green clumps are Carex cherokeensis.

The finished product. Notice the nice layer of chopped plant residue. It is amazing to see 3 to 4 feet of biomass reduced to a few inches. The deep green clumps are Carex cherokeensis.

And, we were able to find Narcissus × odorus buds still intact after the cut. Mission accomplished.  

Oh, and here’s a video from last year if you want to see the process. Yes, our students do really mow that fast.

Natural Grafts

One of the questions I get about grafting is how in the world did people discover that you could take two different plants and combine their disparate tissues together?  

I think people of old knew grafting was possible because they had seen plant tissues recombine in nature.  Naturalists were outside surveying their environment, and from what they learned from nature, they applied that knowledge to grow plants better.  


We have a massive chinquapin oak (Quercus muehlenbergii) in our front yard in Tennessee.  A few years ago, I noticed for the first time in our thirty years of living there that it has a natural graft on the back side.  It is more unusual than most that I’ve seen because three branches come together.  

The winter frame of chinquapin oak

The winter frame of chinquapin oak

 
Thread this needle. On the back side of the tree is this natural graft where three branches have become one.

Thread this needle. On the back side of the tree is this natural graft where three branches have become one.

 
Here’s a side shot. You can see a branch behind curve up and down to merge with the other two branches.

Here’s a side shot. You can see a branch behind curve up and down to merge with the other two branches.

These natural grafts have been known to occur for a long time.  This bulletin from Kew printed in 1917 (over 100 years ago!) describes the process well.  Branches rub off the outer bark in the wind, callus (wound) tissue forms, and eventually the tissues on the two limbs grow and conjoin together.  It is so fascinating to think about the process of how the vascular tissues of large branches can realign and to witness the products of a years-long process.  

This Week in the Garden: Broccoli Ready for Harvest

I returned home from holiday travel to find my broccoli ready to harvest.  I was delighted to see about 15 speckled-blue balloons rising from the forest of glaucous leaves.  

I tried two new cultivars this year—‘Dura-Pak 16’ and ‘Burney’.  These two varieties caught my eye flipping through the Twilley seed catalog because they were listed as part of the Eastern Broccoli Project, an effort to develop broccoli cultivars for the eastern and southern US that tolerate our warmer nights, have flatter heads to shed rain, and root systems that are more tolerant of wet soils.

It was certainly a good year to evaluate their adaptability to wetness.   Greg Grant posted online the other day we’ve gotten 82 inches of rain this past year.  Just since September 1, 45 inches have fallen!  That explains why I’ve had a creek running through my yard since October.  

The plugs also got into the ground a little late, but it’s not uncommon for me to be harvesting broccoli in December and January.  Now, I’m curious to see how these types do on the other end of the cool-season spectrum.  We shall see come later this spring.  

One of my favorite ways to cook broccoli is a recipe learned from Alton Brown’s Good Eats.  Wash it well.  Quarter the florets and stems.  Put it in a skillet with about a 1/4 cup of water.  Turn the heat on high for three minutes and then low for three minutes.  Add some butter and salt, and you’re good to go.  

The buds of ‘Dura-Pak 16’ are quite tight.

The buds of ‘Dura-Pak 16’ are quite tight.

‘Burney’ buds are getting a little large, but they’re still delicious for eating.

‘Burney’ buds are getting a little large, but they’re still delicious for eating.


Students Showcase an Interest in Horticulture

This weekend, it was my turn to help out with Showcase Saturday, an opportunity for high school students considering SFA to come check out our school’s diversity of majors. When I’ve assisted in the past, we have at most two or three students come up to our agriculture department booth and ask questions about our horticulture program. I expected the same turnout.

But, by the time I left, we had TEN students who had came by and expressed interest in horticulture. I was amazed. From the time the event started at 1:30, I felt like I was talking to students for 45 minutes straight. One student had even come six hours from Oklahoma with her parents because she heard that our program was really good, and she was looking at it over other programs near her home! (In full disclosure, they were headed to her grandparents who lived about an hour away, but still! I was impressed!)

They came with questions about our program, what we offered and how we were different from other universities, and what career opportunities were available after graduation. Not all of them knew the word horticulture. Some came saying they were interested in growing plants or hydroponics.

After my amazement wore off from the constant stream of students interested in growing plants, my analytic scientist brain switched on, and I started asking questions such as how did you even hear about horticulture, a word that normally has low recognition amongst youngsters. The common thread was high school opportunities—classes for horticulture and/or participating in floral design or nursery competitions in FFA. These comments helped to support a trend I’ve seen of more and more high schools offering horticulture classes and doing greenhouse projects. (Even mine back in Tennessee built a greenhouse right after I left!) I would like to see some hard data, but I think there’s something there.

Time will tell if they actually decide on horticulture as a major, but the students’ comments reminded me of what I’ve been preaching. For people to engage with horticulture and plants, they have to come into contact and imbibe the wonder of plants or else this potential passion in many students may lie dormant.

Yes, we have to accept not every seed is viable. Even Aldo Leopold realized, “There are some who can live without wild things and some who cannot.” I believe the same dichotomy applies to encouraging an interest in plants and even pursuing a career in horticulture. But, visiting with the students this weekend reminded me we must be present and keep reaching out to those that love the wild green things in anyway that we can, even if their love hasn’t germinated yet. It did in me, it did in you, and it will in them.

autumn-leaves-highlands-nc.jpg